This Gal Knows
  • Home
  • About
  • Knitting
    • My Projects
    • Quick Tips
    • Masterlists
  • Sewing
  • Crafts
  • Kitchen Adventures
  • Freebies
    • Printables
    • Vintage Knitting Patterns
  • Shop
    • Etsy
    • Etsy
    • Redbubble
  • Contact

Wednesday, November 15, 2017

Freebie: Gift List Planner Printable

Holiday gift list planner printable

It's that time of the year again, time to start thinking about Christmas gifts. I don't know about anyone else, but I can get a little overwhelmed when trying to figure out what to buy everyone. That's why I created this little printable to help me.

This one page printable is perfect for planning your holiday gift giving. With it, you can be sure that when we get a few days before Christmas you won't be scrambling to come up with ideas because you forgot someone. There's enough space to brainstorm five gift ideas for eight different people.

Tips:

  • Place it in a central area in the house and people can jot down ideas for what they want
  • Print two copies double sided if you need more room.
  • Use one box as a brainstorm for the person, (what are their interests, have they mentioned things they want?) Then the box next to it can be used to jot down actual items you intend to buy them.
  • If you want to be more environmentally friendly, download the GoodNotes App and fill it out digitally.


If you like this printable and find it useful, please consider buying me a coffee so I can continue to bring you guys free printables. For more information about what it means to buy me a coffee click here.
Posted by Mandi at 11:53 AM No comments:
Email ThisBlogThis!Share to XShare to FacebookShare to Pinterest
Labels: free: printable, freebies

Friday, October 27, 2017

Fresh Off The Needles: Keia's Sweater

Hand knit dropped shoulder sweater


I have to admit, this sweater had me 10 different kinds of nervous. Not because the sweater itself was hard. It’s just a plain stockinette sweater. No, this was my first time knitting a sweater for someone who isn’t me.

I offered to make my sister, Keia, a sweater sometime last summer. I was a little worried before I even started the sweater. I felt like there were a hundred things that could go wrong. My anxiety only intensified, when it looked like it was coming out way too big. But when I finally seamed the shoulders together, and Keia tried it on, it turned out it fit perfectly. That’s one downside to knitting a sweater bottom up, you can’t try it on as you knit.

The only thing I would change is I would knit the sleeves much smaller. They're not terrible, but they'd look and probably feel a lot better if they were a smaller.

Before I even cast on, I knew I might not have enough yarn. Initially, I wasn't aware of how big she wanted the sweater to be. When she told me she wanted it closer to a men’s small than a women’s small, I started to worry. Luckily, for me, I was able to just barely knit this entire sweater with the 10 skeins that I had ordered. I did have to sacrifice a round on the collar though.

The Pattern

My original plan was to find a pattern for a full cabled sweater. But in the end, I decided to to go super simple so I could get the general feel of what Keia wanted from a sweater before I dove right in with a complicated sweater. I used the Knitter's Handy Book of Sweater Patterns by Ann Budd. It’s well documented that I love this book. It’s perfect for when I’m knitting just a plain stockinette sweater and need a launching off point.

Since Keia didn’t want a super fitted sweater, I had a lot of leeway. She likes her cozy clothes to be a men’s size small, so that’s what I aimed for. Since she didn’t have anything that had the fit she was looking for. I used the yarn craft council to find the right measurements. It was and always will be an invaluable resource for sizing.

I knit the entire body in the round until the armholes then knit the fronts and back separately. The whole thing was a breeze really because I opted to do a drop shoulder instead of a set in sleeve. Sometimes I feel like going the dropped shoulder route is cheating, but then I realize, “who the hell said knitting was supposed to be hard?” I need to remember this every time I start making knitting more difficult than it has to be.

The Yarn

The yarn I used is Knit Picks Swish Worsted in the Jade colorway. This yarn has quite a bit of negative feedback on Ravelry. But I've used it a few times and can't complain too much. I'm not going to pretend like it wears super well because it doesn’t. It gets pretty fuzzy pretty quickly. But I like the look of fuzzy sweaters, and the fuzz doesn't shed, so it doesn't bother me too much.

Even though I’m super happy and proud that I’m at this point where I can pretty much make up my own simple sweater patterns, I’m 100% ready to just sit back and let someone else worry about all the nitty gritty math details. I swear that the next sweater you see me knit is going to be someone else’s design.

To see what other sweaters I have planned for the year, follow me on Instagram.
Posted by Mandi at 12:00 PM No comments:
Email ThisBlogThis!Share to XShare to FacebookShare to Pinterest
Labels: finished object, knitting, this gal knits

Wednesday, October 4, 2017

Fresh off the needles: The Pickle Hat

Hand knit hat with hand dyed yarn

After one last heat wave a week ago, I think it’s safe to say we’re in the full swing of fall. It’s finally time we get to pull out our hand knits. I knit this hat that I’ve dubbed the Pickle hat approximately two heat waves ago and I’m so happy I finally get to share it.

The Pattern

This is the second time I’ve knit Seaforth by Karie Westermann. For whatever reason, when I knit it the first time, I decided to make the larger size, which I never do. The thing turned out too big and now I hardly ever wear it. It was so fun to knit, though, I knew I had to make another one.

The pattern is clear and concise, it even gives you some great tips so you can modify it if need be. I’m not all that great with lace patterns. I’m so not great at them that I’ve given up ever trying to knit shawls with lace. But this pattern is only four rounds and incredibly well written which makes it easy enough even I find it extremely simple.

The Cast -On

This is in no way anything revolutionary, but my new favorite cast on for hats is the German Twisted cast on, which is the cast on I did for this hat. It’s super stretchy and is incredibly comfortable to wear. I especially like it for baby hats. A lot of times, when I use a regular long tail cast on, my niece will grow out of the brim of a hat even though there’s a ton of room left in the actual body of the hat.

The Yarn

In January, I made it a goal that I would support indie dyers. My first purchase was this wonderful worsted weight yarn by Dyeabolical Yarns in the Okie Dokie Atrichokey colorway. I love this yarn so much. The color is perfect. But since I’m not too familiar with what an artichoke looks like, I was always thinking of pickles whenever I was knitting it. Hence the name Pickle Hat.

My favorite thing about this yarn? This was my first time using indie dyed yarn, so I wanted my pattern choice to be perfect. I think I cast on at least half a dozen different hats. This yarn held up through all of them. I love a yarn that can handle my severe indecisiveness. It also leads me to believe that it’ll wear well over time.

One of the main reasons I haven’t been buying more indie dyed yarn is because a lot of yarn dyers have shop updates, where they dye up batches of yarn and then put it all in their shop and when it’s gone, it’s gone. Without fail, I always miss them. Either, I find out about the update too late, or when there is an update, I don’t have the money in my budget to order. What I loved about ordering from Dyeabolical Yarns, is that she dyes to order. Which means, I was able to order when I had the money in my budget to do so and I don’t have to worry about it.

I couldn’t be more happy that this is the pattern I settled on for this yarn. They work so well together and it’s already becoming one of my favorite hats.

Wanna see more of my indie purchases? Follow me on Tumblr, and Instagram for constant updates.
Posted by Mandi at 12:00 PM No comments:
Email ThisBlogThis!Share to XShare to FacebookShare to Pinterest
Labels: finished object, knitting, this gal knits

Wednesday, September 6, 2017

Tutorial: Easy DIY notebook cover

DIY Easy Notebook Cover ~ This Gal Knows
This post contains affiliate links, which cost you nothing, but when you buy something through these links I get a small commission.

As someone who’s found it hard to transition my writing and note taking into the digital age, I love me a good old fashion notebook. But when you love notebooks as much as I do, and if you’re always picking up a new one every trip into Target, then you know that eventually, the pickings become pretty slim. That's what inspired me to start creating my own notebook covers.

Sometime last year, I finally joined Pottermore and was sorted into Hufflepuff House. Since then, I've been a diehard badger. I decided to create my own little notebook cover to show off my Hufflepuff pride. That's when I thought, “Hmm, maybe other people feel this passionately about their own Hogwarts House.” Doubtful, but I still decided to create printable book covers for all four houses.

The Printable

What's included:
[1] Four page PDF, each page has one cover sheet


These printables were designed for this specific Miliko notebook. I like it because the clear cover allows me to customize it with little effort. And I can be sure that my new custom cover sheet won't be damaged in my bag. I also dig that they come with different paper options: lined, dot grid and square grid.

Printing tips
Print on high quality
Use the page range function to choose which page you want to print
Use the borderless print function if your printer allows it.
Use a high-quality paper

The Tutorial

Gather Your Supplies
Miliko Transparent Hardcover Notebook
Scissors
Pencil or pen
Paper
Screw hole punch with 4mm bit
Paper clips
Printable book cover
Glue stick (optional)
Straight edge cutter (optional)
Piece of wood (optional)

Step One
DIY Notebook Cover Tutorial: Part One
Using a sheet of the notebook’s paper as a guide, cut the printable to size. I like to use paper clips here to avoid unwanted shifting while I’m cutting.

Step Two
DIY Notebook Cover Tutorial: Part Two
Still using your notebook’s paper as a guide, on the back of the printable, shade in where the holes should go.

Step Three
DIY Notebook Cover Tutorial: Part Three
If you’re worried about damaging your work table, place a scrap piece of wood down.

Double check to make sure you marked the holes on the correct side. Then, using the screw hole punch fitted with the 4mm bit, punch holes where you made your markings.

A few hanging charlies won’t be the end of the world, but let’s try not to repeat the 2000 presidential elections.

Step Four
DIY Notebook Cover Tutorial: Part Four
Using a pair of scissors, clip the holes open creating a clean frayed edge.

Step Five
DIY Notebook Cover Tutorial: Part Five
Push the frayed edges in between the spirals. I used a mechanical pencil, but you could use a pen cap, paper clip, knitting needle or anything that’s handy.

You can leave it as is. Or if you want some added reinforcement, you can use the glue stick and glue the new cover sheet to the first page of your notebook.
DIY Notebook Cover Tutorial: You're Done

Now you can go and show off your house pride. Don't forget to follow me on Instagram and tag @thisgalknows to show me your finished house notebook. When you're done doing that, come back here and tell me what Hogwarts House you're in.

If you like this tutorial and printable and find it useful, please consider buying me a coffee so I can continue to bring you guys free tutorials and printables. For more information about what it means to buy me a coffee click here.

Posted by Mandi at 12:00 PM No comments:
Email ThisBlogThis!Share to XShare to FacebookShare to Pinterest
Labels: free: printable, freebies, tutorial

Wednesday, August 23, 2017

Fresh off the needles: Poison Ivy Sweater

Hand Knit Vintage Columbia Minerva cardigan

Finally! I have a finished object to share. I’ve said it before, but, man, does my knitting mojo go away in the summer time. I’ve actually had this done for at least a month but wasn’t about to risk a heat stroke to take a few pictures to share with you guys. I finally got a decent day to take some pictures over the weekend and can finally share.

The Pattern

The pattern I used Columbia Minerva 747 from the Festival of Sweaters booklet. It was first published in the late 1960s. Which is my favorite fashion era, in case you were wondering. I wish I could share it, but since it’s still under copyright, I can’t. But you can buy it off Etsy here.

Sometimes, vintage patterns can be a bit hairy to work with, but this one was very straightforward and easy to follow. I didn’t even make too many revisions to it. I did end up casting on fewer stitches so that I wouldn’t end up with as much positive ease as the pattern called for. But that wasn’t too big of a thing. I also knit it all as one piece instead of in pieces like the pattern called for. Also, no big deal.

What I’ve learned

Button placement is important! I didn’t have a ton of problems with the spacing of the buttons. I found a great site that helped me figure out how to space them. So, I’m happy with that. But I didn’t even consider how far into the button band I should actually sew on my buttons. As a result, the cardigan kind of pulls apart when fully buttoned up. I’ll probably take them off and fix it. But it’s something I now know I have to think about beforehand to save myself a headache. I also chose buttons that are a little bit too small for the button hole I made. So, I might end up with a whole new button choice as well.

All that reverse stockinette? Did you really purl every row?

Yes! I’m aware that I could have turned the sleeves inside out then knit every row. But I’m a firm believer that you shouldn’t shy away from the purl stitch. I did for too long, so it takes me twice as long to finish a purl row than it does a knit row. So, I convinced myself that I had to purl every round of my sleeves. By the end of the second sleeve, my purling speed had improved greatly. I don’t dread the purl row anymore. This was probably the single greatest thing I’ve done for my knitting.

Why call it Poison Ivy?

Since I knit the bulk of this cardigan about a year ago, when I was watching Batman v Superman on repeat, I knew I wanted to give it a comic book inspired name. My first thought was the Kryptonite Sweater, but then when I realized that the stitch pattern had sort of an ivy feel to it, I named it after one of Batman’s villains, Poison Ivy.

I'm actually already planning to knit this sweater again but in a golden color. If you don't want to miss in progress shots, and more fun stuff, make sure to follow me on Instagram and Pinterest.
Posted by Mandi at 12:00 PM No comments:
Email ThisBlogThis!Share to XShare to FacebookShare to Pinterest
Labels: finished object, knitting, this gal knits

Wednesday, July 26, 2017

The 11 best places to get vintage knitting patterns

The 11 best places to get vintage knitting patterns ~ This Gal Knows
Over the last couple of days, I’ve had the sudden inspiration to knit and sew all of the vintage. I’ve even finally finished my most recent vintage sweater and a skirt from a vintage sewing pattern. I have to attribute this sudden burst of inspiration to Mad Men. I finally finished the last season, and although Don Draper makes my skin crawl most times, the fashion in it always reminds me of how much I love the 60s style trends. It’s not hard to imagine, that that has lead me to obsessing over finding all of the available. I thought it’d be useful to have all the links to my favorite sites in one place.

Free Patterns

When I first started out on my vintage knitting journey, I never thought there would be so many patterns available for free. Here are below are a few of my favorite sites that share from their stash.

Free Vintage Knitting
Subversive Femme
The Sunny Stitcher
Musing from Marilyn
Purple Kitty Yarns
Vintage Pattern Files

For sale

Sometimes you find a picture of a knitting pattern, or see someone knit from a pattern that isn’t available for free so you need to buy it. There are two options, you can either hope to find someone selling a PDF pattern or you can hope to find the actual physical copy.

PDFs
**Please note** I’ve never had any experience buying pdf patterns, so I can’t speak for the quality of any patterns from the below sites

The Vintage Knittng Lady
Etsy - Search for the name of the pattern, and you might have luck.

Physical
Etsy
Ebay

Secondhand shops or antique shops - This isn't something I'd do if I were looking for something specific, but most of my stash does come from antique shops
Estate Sales - Again, it's not something I'd do for something specific, but I have had luck finding piles of pattern booklets at estate sales.

Where are some of your places to get vintage patterns, let me know and I'll add them to the list.

Don't forget I've been sharing vintage patterns on this site and I'm planning on sharing more over the next few months, follow me on Instagram and Pinterest to make sure you don't miss one.
Posted by Mandi at 12:00 PM No comments:
Email ThisBlogThis!Share to XShare to FacebookShare to Pinterest
Labels: knitting

Friday, June 23, 2017

Three Ways to Get Out of a Knitting Rut

3 Ways to get Out of a Knitting rut ~This Gal Knows
This post contains affiliate links, which cost you nothing, but when you buy something through these links I get a small commission. 

You guys, I don't know if it's the incredibly shitty news coming out of my home state, the warm weather, or maybe it's the way the planets are aligned, but I haven't felt like knitting at all for the last couple of weeks. This has really gone on long enough. I'm desperate for something to change, so here are some things I'm going to try over the next few days to snap myself out of this rut.

Scroll through Ravelry

I honestly don't know what spurred this rut that I'm in. I have a few not so fun projects going on right now, so that may be part of it. Maybe what I need is to start a new project. My thought is, if I go through all the wonderful projects and patterns on Ravelry, maybe it'll spark something in me and I can get excited about knitting again.

Organize my knitting binder

A few weeks ago, I talked about my method of organizing my knitting binder. At the time I really had no desire to go through old projects and organize them. But now I'm thinking if I take the time to go through my finished objects it’ll inspire me to want to create some more finished objects.

Go through stitch books

Sometimes I just need something small and a little challenging to remind myself what I love so much about knitting. I’m going to try to pick a few stitches and make a few swatches. Who knows, I might even come up with a fun sweater pattern while I'm at it.

Some of my favorite stitch books books are:
400 Knitting Stitches: A Complete Dictionary of Essential Stitch Patterns
The Essential Stitch Collection: Creative Guide to the 300 Stitches Every Knitter Needs to Know

Also I'm really enjoying the 100 Days of Stitches Jennifer from Brome Fields Knitwear is doing and can see myself getting some inspiration from there.

What are some of the ways you guys get out of a knitting rut? Let me know in the comments.

Follow me on Tumblr, Twitter, Instagram and Pinterest.
Posted by Mandi at 12:00 PM No comments:
Email ThisBlogThis!Share to XShare to FacebookShare to Pinterest
Labels: knitting

Wednesday, June 14, 2017

What I'm knitting this summer

What to knit this summer ~ This Gal Knows
I don’t know about anyone else, but I always find it really hard to motivate myself to knit once the weather starts to warm up. I get very little knitting done in the summer. But once those cool September nights come back my needles are flying.

With all of that said, none that really makes much sense to me since I'm not an outdoor type of person. I tend to sit in my air conditioned house most days anyway. So, why am I not knitting?

This summer I'm going to try my hardest to get myself prepared for winter. Below are some of the things I’m going to work on.

Hats

I always have it in my head that I want to knit a new hat for everyone before winter comes. But I tend to start planning them way too late, and then by time I get to picking the pattern and yarn, winter is almost over.

Seaforth by Karie Westermann
“Once Upon a Time” Inspired Ruby Beret
Ravelry Hat Bundle
Pinterest Hat Board

Sweaters

I just don't have nearly enough finished handknit sweaters in my life. Plus I’ve promised my sister at least a dozen cozy sweaters and have finished exactly zero for her.

Beatnik by Norah Gaughn
Que Sera by Kristen Kapur
Ravelry Pullover Bundle
Ravelry Cardigan Bundle
Pinterest Sweater Board

Socks

I have so much Knit Picks Felici to knit through. And I like the idea of socks for when it's too hot to have thick yarn running through your fingers.

Bubbles Down the Drain by Staci Perry
Froot Loops by Kristi Geraci

Does the warmer weather tend to slow you guys down when it comes to knitting? What are some things you do to get over it?

Don't for get to follow me on Tumblr, Twitter, Instagram and Pinterest.
Posted by Mandi at 12:00 PM No comments:
Email ThisBlogThis!Share to XShare to FacebookShare to Pinterest
Labels: knitting

Wednesday, June 7, 2017

Free Vintage Pattern: 1940s Men's V-Neck Pullover

Free Vintage Sweater Pattern for Men ~ This Gal Knows

Look dapper in this classy 1940s pullover cable sweater. It could easily be worn to the office with a business casual look or on a lazy weekend afternoon in front of the fire with your favorite book and beverage of choice.

This pullover is knit in pieces from the bottom up with set-in sleeves. It features a cable pattern on the front and a simple 2x2 rib on the back. The pattern is written for one size with a chest measurement of 38”.

If you’d like to size this pattern up or down, I highly recommend Tasha’s knit-along on her website By Gum By Golly. Or check out some other sweater knitting resources.

Specs

Publication Date: 1947
Publication Name: Jack Frost #45 - Sweaters for Men and Boys 
Gauge: 6.5 sts = 1in
Sizes: 38" chest

Yarn

The pattern calls for 400 grams of sport weight yarn.


Posted by Mandi at 12:00 PM No comments:
Email ThisBlogThis!Share to XShare to FacebookShare to Pinterest
Labels: free: vintage patterns, freebies, knitting

Wednesday, May 31, 2017

Looking ahead to Me Made May 2018

Looking ahead to me made may
For the past three or four years, I've been wanting to participate in Me Made May. Me Made May is when you wear clothes you made yourself. Every year, May just sort of comes at me with no warning and I realize I've done little to no sewing since the previous May. Of course, I can wear the sweaters I've made, but May really isn't the most knit sweater friendly month.

One of my life goals is to have a completely Me Made wardrobe. One of my 2017 goals was even to sew more. Which honestly won’t be hard since I haven't even looked at a sewing machine in over a year. Really the only thing stopping me from having a decent sized Me Made collection is just sitting down and getting some sewing done. I have more than enough fabric and patterns to have some really great pieces.

As this May is coming to a close, I’m making a pledge right now to plan for next year’s Me Made May. I'm going to challenge myself to create at least one wearable sewn object each month from now until then. Starting in June, I'll be sharing at least one sewn garment each month here on the blog. Hopefully by time May 1, 2018 rolls around I’ll have enough pieces to fill most of the month.

Here's to hoping this is exactly what I need to get me motivated to actually sit down at the sewing table and get some work done. What are some things you guys do to get yourself motivated to accomplish a goal?

If you want to see my progress make sure to follow me on Instagram and Pinterest.
Posted by Mandi at 12:00 PM 1 comment:
Email ThisBlogThis!Share to XShare to FacebookShare to Pinterest
Labels: sewing, this gal sews

Wednesday, May 24, 2017

Freebie: Knitters Unite Coloring Page Printable

Free Printable: Knitter's Unite ~ This Gal Knows
This post contains affiliate links, which cost you nothing, but when you buy something through these links I get a small commission.

I’m back today with another free coloring sheet! This is pretty much the same story as my last coloring sheet. I created this to be a little journal cover. I'm thinking this would be great as a cover for my blog binder.

I've been thinking about some hobbies I can experiment with besides knitting and sewing. I've always been interested in learning to draw, I've found a ton of tutorials online that will help learn. I can manage to create some good things digitally, but haven't quite gotten the hang of pen and paper art. So, I'm hoping that if I experiment with coloring in some of my digital art, it'll help me with creating more traditional pieces. Plus, I think getting used to drawing will help me down the road for if I ever decide I want to start designing knitwear.

I haven't had a chance to mess around with any color techniques, but I really do want to invest in some good Copic Markers, or at least some Copic type markers, like the much cheaper alternative Ohuhu Markers.

If you don't really feel like coloring I have prints, notebooks, t-shirts and mugs available through RedBubble.

What’s Included
[1] 8.5” x 11” coloring page in a PDF format

Printing tips
  • Print on high quality for best results


I do have a couple more coloring sheets I plan to share, make sure to follow me on Tumblr, Twitter, Instagram and Pinterest to make sure you don't miss any.

If you like this printable and find it useful, please consider buying me a coffee so I can continue to bring you guys free printables. For more information about what it means to buy me a coffee click here.
Posted by Mandi at 12:00 PM No comments:
Email ThisBlogThis!Share to XShare to FacebookShare to Pinterest
Labels: free: printable, freebies

Wednesday, May 17, 2017

The Ultimate Guide to An Organized Knitting Binder

The Ultimate Guide to An Organized Knitting Binder
This post contains affiliate links, which cost you nothing, but when you buy something through these links I get a small commission.

A couple weeks ago, I shared my Knitting Binder Printable. I've been doing test runs on it for almost a year, and during that time I had the chance to figure out what the best way to use it is. Today I'm going to share my process with all of you. Hopefully it helps at least one person out there become more organized.

Step One : Print and fill out the project page

Supplies:
Knitting Binder Printable
White cardstock
Flair Felt Tip Pens
Juice Gel Pens

I print all of my project pages on cardstock. I do this because it really helps separate the project page and the notes that are associated with each project. I also like to have something a little more sturdy for when I add a DIY folder to the back. More on that in a bit.

My only tip for the actual printing process is to make sure that you have the “actual size” option checked in the print dialogue box before printing.

After I have the page I want printed out, I fill it out. I like using the felt tip pen for project name, patterns used, size, made for, needles, gauge and yarn. Then if I have any notes I want to add to the notes section I use the gel pens. I just like to have all the important information in a bolder pen for a quick reference. Also, this is totally optional, I like to color code my pen colors with the colors of my project. I just think it looks nice.

Step two: Where to start

One of the first things I had to do was figure out what projects I was going to include in the binder. Like I mentioned a couple weeks ago, I have one mess of a binder with some relevant notes and a notebook that I use to jot things down in when I'm knitting a project. I wasn't sure if I wanted to go through that mess and reorganize or just start fresh with my current WIPs. Really, my only deciding factor was whether or not I wanted to take the time to reorganize. I decided I didn't, so I started from my current FOs.

Step three: Make folders 

Supplies:
Scrapbook paper
Glue stick

One of my major goals for my new binder was to have a place where I had my notes and my swatches in one place. More times than I’d like to admit, I make project notes on whatever fun notepad is nearby. To keep all of these in one place, I create folders for the back of each project page. This is why it’s important for me to print each project page on cardstock.
how to create a folder using craft paper
To make the folder :
  1. Fold the piece of scrapbook paper in half (hamburger style)
  2. Glue each side together (see above picture)
  3. Glue the finished folder to the back of the project page
It's a perfect place to keep my swatches, and other random notes I have floating around. I also like to keep my yarn labels in here, if I remember to keep them that is.

Another option would be to print the page out on regular paper and put it in a page protector. And put all of your notes and swatches in the back of the sheet protector.

A post shared by This Gal Knows (@thisgalknows) on Jun 1, 2017 at 11:25am PDT
Once I have my folders made, I get all my notes and patterns together, three hole punch them and put them in my binder behind my project page. See the video above for a clear demonstration. I like doing this because it gives my projects a definite starting and stopping point. With my old binder, I'd have notes and patterns all thrown in together and it'd be nearly impossible to figure out which notes went with which pattern, especially since not all my notes were associated with a printed out pattern.

Step 3: Decide how to organize projects. 

Honestly, I haven't decided on how to do this one yet. On one hand I want to organize them by project type i.e. Sweater, Socks, etc. On the other hand, I want to have them go in order chronologically. Currently, I have them in order of when I finished them Oldest to newest. It’s working for me now, but I’m not sure how it’ll work when I get more projects in there.

This method has been working out really well for me. As I get more projects in there I'm sure I'll have to revise my method. Do you guys have any thoughts on how you’ll use these in your binders? Let me know in the comments.

Over the next few weeks and months, I'm going to share more tips on how to use my knitting binder printables follow me on Tumblr, Twitter, Instagram and Pinterest to make sure you don't miss anything.
Posted by Mandi at 12:00 PM No comments:
Email ThisBlogThis!Share to XShare to FacebookShare to Pinterest
Labels: knitting

Wednesday, May 10, 2017

Free Vintage Pattern: 1940s Mommy and Me Cardigan

Free Vintage Mother and Daughter Sweater Pattern ~ This Gal Knows

Mother’s Day is right around the corner, so I thought I'd share a fun mother/daughter pattern set. The Mother's or Daughter’s Ski Jacket is as the name implies, designed to be knit for either a mother or her teenage daughter. The pattern was originally published in 1946 by Royal Society. I do wish their was a pattern for the younger girl too, but unfortunately it's only for teens and adults.

The cardigan has a simple knit and purl stitch pattern, so, if you did want to knit this in a smaller size, it would be simple enough to size down. You could either do the math yourself, I would suggest using Tasha’s How to Fit and Knit a 40s Pullover at By Gum By Golly, as a reference. Or you could use your favorite toddler or kid sweater pattern and substitute the stitch pattern.

This is a really cute cardigan with a set in sleeve and has a high round neckline. It's finished off with a single crochet chain around the front and neck band. The picture shows embroidery on the front but the only instructions in the pattern is to “embroider as desired”. Don't you just love those oh-so-specific finishing instructions?

As for most, if not all, vintage knitting patterns, this cardigan is knit flat, in pieces. I know there are a lot of people out there who hate seaming and would prefer to knit a cardigan in one piece. To do this, all you have to do is add all the cast on numbers for each piece (the two fronts and the back) together, and subtract 1 at each seam. That number is your cast on. When you cast on make sure to place markers to indicate where each piece starts and ends. That way, if there's any shaping, you know where to work it. Depending on my next vintage knit project, I might do a full tutorial. Stay tuned for that.

If you do opt to go the seamless route, you'll still need to split for the front and back to work armhole shaping, then seam the shoulders. Then you could either knit the sleeves flat and set them in, or you could follow another one of Tasha's tutorials for working set in sleeves from the top down.

The pattern calls for a discontinued yarn, I did a little bit of research and couldn't find anything on the specific yarn. But, judging by the gauge in the pattern, it’s close to an Aran weight. Given the date of this pattern, my best guess would be that it is a wool.

Although it doesn't go as small as I would have liked, it still has a pretty decent size range. It goes from a bust size of 33” to 39”. My favorite part of this entire pattern is that it has all the blocking measurements all laid out for you. When dealing with vintage patterns, it can be really hit or miss whether these details are included or not.


I've always thought these Mother/Daughter matching patterns were cute, but I don’t think I'd ever want to go around wearing the same sweater as my mom. What do you guys think, would you ever knit you and your daughter matching sweaters? Or if you're a daughter that knits, would you knit a matching sweater for you and your mom?

Over the next few months I'll be sharing more vintage patterns from my collection, follow me on Instagram and Pinterest to make sure you don't miss a pattern.

If you like this free vintage pattern, please consider buying me a coffee so I can continue to bring you guys free vintage patterns. For more information about what it means to buy me a coffee click here.

Free Vintage Knitting Pattern ~ This Gal Knows

Posted by Mandi at 12:00 PM No comments:
Email ThisBlogThis!Share to XShare to FacebookShare to Pinterest
Labels: free: vintage patterns, knitting

Wednesday, May 3, 2017

Knitting Binder Printable

This Gal Knows: Knitting Binder Printable
Since I started knitting I’ve been creating this mess of a binder I called my “project binder”. It includes mostly patterns I liked once upon a time, a few finished projects with some actual decent notes and a random folder full of hot pink filler paper. I don't know, don't ask.

I quickly realized that wasn't going to cut it. So, I for some reason thought a random notebook with all my random brainstorming ideas and pattern notes would work out. That actually does work better, especially when I'm working on a project. I'm less likely to lose my notes if they're stuck in an actual notebook. But I still liked the idea of having my printed off pattern, random notes and my swatches all in one place. And that's how my binder printouts came to be.

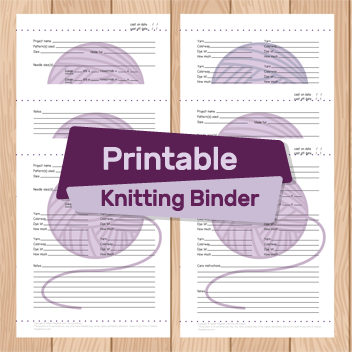
There are 4 project pages, a page for additional yarn, a page for additional notes, and a project tracker page. There's really something for every project.

Each project page has space for you to record the following:
  • Project name
  • Patterns used
  • Size
  • Who the object was made for
  • Needle sizes and gauge (both unblocked and blocked)
There's a different project page with different yarn slots that can be used to fit your needs:
  • 2 yarn slots with a large section for notes
  • 4 yarn slots with a section for notes
  • 4 yarn slots with care instruction section and notes section
  • 8 yarn slots
Additional pages include:
  • 12 additional yarn slots (if eight isn't enough)
  • Notes page
  • Project tracker - with space to record project name and both the cast on and cast off date
The binder comes in 4 color options:
  • Blue
  • Green
  • Purple
  • Pink
Printing Tips
  • For best results print on high quality
  • Make sure actual size box is checked
  • (Optional) Print borderless, if your printer allows it

These printouts have really been a lifesaver. I've been knitting a lot more sweaters recently and have knit all of my sleeves the same way. If was still “organizing” projects the way I used to, I never would remember what I’d done the time before and probably would spend a ton of time figuring it out again.

Stay tuned for more posts about how I use these sheets, follow me on Instagram to make sure you don't miss a thing.

Posted by Mandi at 12:00 PM No comments:
Email ThisBlogThis!Share to XShare to FacebookShare to Pinterest
Labels: knitting, printables

Wednesday, April 26, 2017

Fresh off the needles: It Goes Both Ways Toddler Hat

It goes both ways toddler hat
Why do kids have to grow so fast? My niece grew out of all her hats I've made her. Naturally, now that the weather is warming up, I decided I should probably get on to knitting her a new one.

The hat I knit was made from a pattern designed by CheyOnna the Yarn Mission.The Yarn Mission is a great company that I love to support as much as possible. They are dedicated to the advancement of justice and the end of an oppressive system through community engagement. For more information visit theyarnmission.com.

The Pattern

The It Goes Both Ways pattern is super clear and super adorable. I love the simple two stitch cables that create an effect that looks nothing like your traditional cable. The pattern is 100% perfect as is and I plan on knitting one for myself in the near future. But my niece got top priority, so I decided to modify it to make it fit her.

The Modifications

To start I used a sport weight yarn instead of worsted. I thought that was going to be enough of a change for me, but doing the math I realized I was going to need to do more. But still, it really wasn't that much. All I did was figure out how many stitches I needed to cast on to get the size I wanted then fudged the numbers a bit to make sure there were enough stitches to end the round with a full pattern repeat.

Having to fudge numbers did make it so that I ended up making a bigger hat than I had planned on. But when I make hats, especially when I make them for kids, I don't worry too much if it comes out a little on the big side. You know how kids are always growing like we don't want them to stay little forever. I figure, it'll fit eventually.

The only thing I wish I had taken the time to do was figure out the decreases like the original pattern. I opted to just do a stockinette section with the decreases. It really would have given the hat a more finished professional look. It does look fine, by all accounts, I just wish I would have put in a little more effort. If it really does end up bothering me a ton, I figure I can always slap a Pom-Pom on it. Pom poms fix everything.

The Yarn

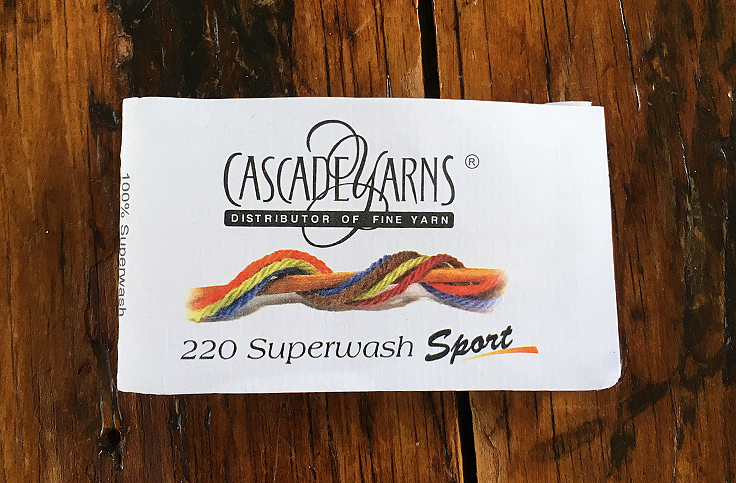
The yarn I used was Cascade 220 Superwash Sport. It is 100% superwash merino. I LOVE this yarn. I’ve always loved the color range that Cascade 220 offers, the colors are rich and vibrant and you can find just about any color you need. But the 100% wool is way too scratchy for me. Then I discovered the Superwash Merino and my life was made. It has the perfect amount of softness for me, but it's not so soft that it's slippery and hard to work with like Knit Picks Swish can be sometimes.

I for one love this hat. My niece? Not so much. Apparently she doesn't wear any thing that's not pink. She won't even try it on. I mean, I do kind of have to agree with her though. The orange I picked isn't really my favorite color either. I guess that only means I'll have to make her a pink one next.

Want to keep track of my adventures knitting for a fickle three year old? Follow me on Instagram.

Posted by Mandi at 12:00 PM No comments:
Email ThisBlogThis!Share to XShare to FacebookShare to Pinterest
Labels: finished object, knitting, this gal knits

Wednesday, April 19, 2017

This Gal Knows Book Review: The Handy Book of Sweater Patterns

This Gal Knows Book Review: The Handy Book of Sweater Patterns
Disclaimer: This post contains affiliate links, which cost you nothing, but when you buy something through these links I get a small commission. I also bought this book with my own money and was not asked to review it. All my thoughts and opinions are my own.

One of my first goals after learning to knit was to knit a sweater. I knit a few conventional sweater patterns, but it was hard for me to find patterns that came in my size. So, naturally I jumped head first into adapting the pattern all on my own. Let's just say, that little adventure may or may not have ended with me flinging notebooks around the room. Luckily, that’s when I discovered The Handy Book of Sweaters by Ann Budd.

The Handy Book of Sweater Patterns includes instructions for six different sweater constructions (Drop shoulder, Modified drop shoulder, Set-in sleeve, saddle shoulder, Raglan, and Seamless yoke). Each sweater construction is broken into two sections; kids sizes (26 in chest to 34 chest), and adult sizes (36 in chest to 54 in chest). Each size section is then broken down into five gauges. All you have to do is swatch your yarn, pick the size you want to knit and you have a basic sweater pattern that you can customize as you see fit. With this ginormous range of sizes, it’s been perfect for when I’m trying to resize certain patterns.

It by no means is a fully comprehensive design book, you will still need to know basics about what roles certain yarns and stitch patterns play in your finished sweater. But there are piles upon piles of books out there with that type of information. As well as some great online resources.

I will say, that while I think it’s great for beginner sweater knitters, I suggest you try out a conventional sweater pattern first, especially one geared towards first time sweater knitters. Or at the very least watch a few video tutorials to fully understand sweater construction. There are a few things that I can see becoming confusing for someone who hasn’t knit a sweater before. Here's a Ravelry bundle I'm working on filled with good beginner sweater patterns.

My absolute favorite thing about the book is the wide variety of pattern options. You could literally knit something for the entire family from this book. The sizes may not go down to infant sizes, but with the measurements of your desired finished object, your gauge and a little bit of math, you could easily use the numbers for a different gauge and size and make it work for your baby.

The one thing I really don’t care for is that there’s no bottom up instructions for raglan sleeves. In the book it gives instructions for top down raglan sweaters. I know it’s more common to knit a raglan sweater top down, but I’ve come to realize I don’t really care for the line of increases down the sleeve and I would have really like to have bottom up instructions. It’s especially frustrating since there was eventually an entire book dedicated to top down sweater construction.

I really love the flexibility of this book and I would really recommend this book to any knitter who likes to knit sweaters and wants to bring their sweaters to the next level. It's especially handy for folks who knit several different sweater sizes. Or those of you who are like me, and need a little help modifying an existing pattern to work for you.

Have you used this book in the past? I'd love to hear your experiences in the comment section.

As always to see my sweater process, follow me on Tumblr, Twitter, Instagram and Pinterest.

This Gal Knows Book Review The Handy Book of Sweater Patterns
Posted by Mandi at 12:00 PM No comments:
Email ThisBlogThis!Share to XShare to FacebookShare to Pinterest
Labels: book review

Wednesday, April 12, 2017

Free Coloring Page Printable

knitting coloring page


Who doesn't love to color? I know I do. I may not be that great at it, but I love it anyway. That's why today, I have a free printable coloring page.

I had fun messing around with a different technique with this coloring page. All I really had on hand were some Crayola Markers that I couldn’t really get to color evenly, so I decided to try a little dot pattern. I thought it turned out alright. I'm not entirely sure how to handle the background. Any suggestions?

I originally created this design because I wanted a fun little knitting journal where I could sketch all my sweater ideas. As I was creating this design for my cover on the computer, I couldn’t make up my mind what colors to do. I decided to create this coloring page so that even after I finalized my color choices, I could still have fun with the design.

What’s Included
[1] 8.5” x 11” coloring page in a PDF format

Printing tips
  • Print on high quality for best results
I'd love to see what you guys come up with. Post your finished pictures on Instagram and tag thisgalknows.

Coloring not your thing? Check out some finished products in my RedBubble shop. You can get fully colored notebooks, prints, t-shirts and mugs.


I have a few more coloring page ideas up my sleeve. Follow me on Instagram so you don't miss out.

If you like this printable and find it useful, please consider buying me a coffee so I can continue to bring you guys free printables. For more information about what it means to buy me a coffee click here.

Posted by Mandi at 12:00 PM No comments:
Email ThisBlogThis!Share to XShare to FacebookShare to Pinterest
Labels: free: printable, freebies

Wednesday, April 5, 2017

Fresh Off the Needles: Socks that actually fit

Hand knit socks
I did it! I finally knit a pair of socks that actually fit. Best part? They're not even for me. I finally knit a pair of socks and they fit someone else. Maybe it's not a big deal for most people, but it's a pretty big deal for me. For the longest time, I've been having such trouble with sock knitting that I was about to give it up all together. I would have too if it weren't for all the Knit Picks Felici I've stocked up on. So, how did I do it you ask? Simple, I finally took the time to make a cardboard foot template following the instructions from Fish Lips Kiss Heel pattern. I wish I had done it sooner, it would have saved me a headache or 600. I've had this pattern since my sock knitting journey began (find link to old post). If you're having trouble fitting your socks I highly recommend this pattern. It's only a dollar on Ravelry, so you really don't have much to lose. I knit everything but the heel in Knit Picks Felici in the Surfs Up colorway. Like 99.99% of the sock knitting community, I love this yarn. The only thing I don't love, is that it comes in extremely limited quantities about twice a year, so right now, it's not available on the Knit Picks website. And it's why I have more of it stashed away than I know what to do with.
For the heel, I used some Cascade Heritage in the Snow colorway. I did a simple German Short Row heel instead of the heel called for in the Fish Lips Kiss pattern only because I prefer making my short rows German styles. One thing I still need to figure out when I'm knitting socks is how to avoid the hole at when I start knitting in the round after knitting the heel. I try to pick up an extra stitch to close it up, it that always seems to make it worse. If anyone has any tips I'm all ears. Overall, I'm pretty pumped about my sister’s new socks and am gunna check this in the win column. Have you had a major knitting win? I'd love to hear about it in the comment section.

Want to keep up with all my sock knitting shenanigans? Follow me on Tumblr, Twitter, Instagram and Pinterest.
Posted by Mandi at 12:00 PM No comments:
Email ThisBlogThis!Share to XShare to FacebookShare to Pinterest
Labels: finished object, knitting, this gal knits

Wednesday, March 1, 2017

Project Overload

Anyone else ever have so many knitting projects going on you don't know what to work on? So, you end up working on nothing. Then you go a few days without knitting anything which makes you feel guilty, so you then start a new project to get yourself back into the swing of things? Then as you're working on said new project, your mind starts to wander and you start thinking about all the other abandoned projects you have to work on? And then you're tense and stressed until you finally convince yourself to just stick to one project and the rest will have their time soon enough? Then, finally, you can relax and hopefully start getting some finished objects?

No? Me either. Just asking for a friend. But my friend would really like to know how you all deal with project overload, so, tell me about it in the comments. I'll be sure to pass along the information.

 If you want to stay up to date on all my projects follow me on Tumblr, Twitter, Instagram and Pinterest.

Posted by Mandi at 6:56 PM No comments:
Email ThisBlogThis!Share to XShare to FacebookShare to Pinterest
Labels: knitting, this gal knits
Newer Posts Older Posts Home
Subscribe to: Posts (Atom)

Hi! I'm Mandi. Here you’ll get to see all my current knitting, sewing and craft projects. As well as links to all the resources I've found useful throughout my crafting life.

Printables

Printables

Popular Posts

  • Free Vintage Knitting Pattern: 1960s Chunky Cable Pullover
    Keep warm during sweater season in this classy 1960s cable rib pullover. This raglan sleeve sweater would be perfect for chilly Autumn ni...
  • Annual Christmas Sweater: Round Yoke Redemption
    My 2015 sweater was riddled with fit issues and poorly thought out color substitutions. The following year, 2016, I set out to be far mor...
  • Maker Goals 2021
    On Instagram, I saw nicolespdesigns make a sort of bingo card for her 2021 knitting goals. I thought that was a really good idea and decide...

This Gal's Favorite Blogs

An Awesome View of Life
By Gum By Golly
Lladybird
Tilly and the Buttons
The Sunny Stitcher

Pages

  • Home
  • About Me
  • Knitting Resource Masterlist

Blog Archive

  • ►  2020 (1)
    • ►  December (1)
  • ►  2019 (2)
    • ►  May (2)
  • ►  2018 (9)
    • ►  December (3)
    • ►  November (3)
    • ►  October (1)
    • ►  February (2)
  • ▼  2017 (19)
    • ▼  November (1)
      • Freebie: Gift List Planner Printable
    • ►  October (2)
      • Fresh Off The Needles: Keia's Sweater
      • Fresh off the needles: The Pickle Hat
    • ►  September (1)
      • Tutorial: Easy DIY notebook cover
    • ►  August (1)
      • Fresh off the needles: Poison Ivy Sweater
    • ►  July (1)
      • The 11 best places to get vintage knitting patterns
    • ►  June (3)
      • Three Ways to Get Out of a Knitting Rut
      • What I'm knitting this summer
      • Free Vintage Pattern: 1940s Men's V-Neck Pullover
    • ►  May (5)
      • Looking ahead to Me Made May 2018
      • Freebie: Knitters Unite Coloring Page Printable
      • The Ultimate Guide to An Organized Knitting Binder
      • Free Vintage Pattern: 1940s Mommy and Me Cardigan
      • Knitting Binder Printable
    • ►  April (4)
      • Fresh off the needles: It Goes Both Ways Toddler Hat
      • This Gal Knows Book Review: The Handy Book of Swea...
      • Free Coloring Page Printable
      • Fresh Off the Needles: Socks that actually fit
    • ►  March (1)
      • Project Overload
  • ►  2016 (8)
    • ►  September (2)
    • ►  August (3)
    • ►  June (1)
    • ►  April (1)
    • ►  March (1)
  • ►  2015 (14)
    • ►  November (1)
    • ►  October (1)
    • ►  September (1)
    • ►  August (1)
    • ►  May (1)
    • ►  April (3)
    • ►  March (1)
    • ►  February (1)
    • ►  January (4)
  • ►  2014 (10)
    • ►  November (2)
    • ►  September (4)
    • ►  February (1)
    • ►  January (3)
  • ►  2013 (50)
    • ►  December (2)
    • ►  October (3)
    • ►  September (1)
    • ►  July (2)
    • ►  June (4)
    • ►  May (1)
    • ►  March (4)
    • ►  February (32)
    • ►  January (1)

Copyright © This Gal Knows | Powered by Blogger
Design by Hardeep Asrani | Blogger Theme by NewBloggerThemes.com