This Gal Knows
  • Home
  • About
  • Knitting
    • My Projects
    • Quick Tips
    • Masterlists
  • Sewing
  • Crafts
  • Kitchen Adventures
  • Freebies
    • Printables
    • Vintage Knitting Patterns
  • Shop
    • Etsy
    • Etsy
    • Redbubble
  • Contact

Wednesday, May 31, 2017

Looking ahead to Me Made May 2018

Looking ahead to me made may
For the past three or four years, I've been wanting to participate in Me Made May. Me Made May is when you wear clothes you made yourself. Every year, May just sort of comes at me with no warning and I realize I've done little to no sewing since the previous May. Of course, I can wear the sweaters I've made, but May really isn't the most knit sweater friendly month.

One of my life goals is to have a completely Me Made wardrobe. One of my 2017 goals was even to sew more. Which honestly won’t be hard since I haven't even looked at a sewing machine in over a year. Really the only thing stopping me from having a decent sized Me Made collection is just sitting down and getting some sewing done. I have more than enough fabric and patterns to have some really great pieces.

As this May is coming to a close, I’m making a pledge right now to plan for next year’s Me Made May. I'm going to challenge myself to create at least one wearable sewn object each month from now until then. Starting in June, I'll be sharing at least one sewn garment each month here on the blog. Hopefully by time May 1, 2018 rolls around I’ll have enough pieces to fill most of the month.

Here's to hoping this is exactly what I need to get me motivated to actually sit down at the sewing table and get some work done. What are some things you guys do to get yourself motivated to accomplish a goal?

If you want to see my progress make sure to follow me on Instagram and Pinterest.
Posted by Mandi at 12:00 PM 1 comment:
Email ThisBlogThis!Share to XShare to FacebookShare to Pinterest
Labels: sewing, this gal sews

Wednesday, May 24, 2017

Freebie: Knitters Unite Coloring Page Printable

Free Printable: Knitter's Unite ~ This Gal Knows
This post contains affiliate links, which cost you nothing, but when you buy something through these links I get a small commission.

I’m back today with another free coloring sheet! This is pretty much the same story as my last coloring sheet. I created this to be a little journal cover. I'm thinking this would be great as a cover for my blog binder.

I've been thinking about some hobbies I can experiment with besides knitting and sewing. I've always been interested in learning to draw, I've found a ton of tutorials online that will help learn. I can manage to create some good things digitally, but haven't quite gotten the hang of pen and paper art. So, I'm hoping that if I experiment with coloring in some of my digital art, it'll help me with creating more traditional pieces. Plus, I think getting used to drawing will help me down the road for if I ever decide I want to start designing knitwear.

I haven't had a chance to mess around with any color techniques, but I really do want to invest in some good Copic Markers, or at least some Copic type markers, like the much cheaper alternative Ohuhu Markers.

If you don't really feel like coloring I have prints, notebooks, t-shirts and mugs available through RedBubble.

What’s Included
[1] 8.5” x 11” coloring page in a PDF format

Printing tips
  • Print on high quality for best results


I do have a couple more coloring sheets I plan to share, make sure to follow me on Tumblr, Twitter, Instagram and Pinterest to make sure you don't miss any.

If you like this printable and find it useful, please consider buying me a coffee so I can continue to bring you guys free printables. For more information about what it means to buy me a coffee click here.
Posted by Mandi at 12:00 PM No comments:
Email ThisBlogThis!Share to XShare to FacebookShare to Pinterest
Labels: free: printable, freebies

Wednesday, May 17, 2017

The Ultimate Guide to An Organized Knitting Binder

The Ultimate Guide to An Organized Knitting Binder
This post contains affiliate links, which cost you nothing, but when you buy something through these links I get a small commission.

A couple weeks ago, I shared my Knitting Binder Printable. I've been doing test runs on it for almost a year, and during that time I had the chance to figure out what the best way to use it is. Today I'm going to share my process with all of you. Hopefully it helps at least one person out there become more organized.

Step One : Print and fill out the project page

Supplies:
Knitting Binder Printable
White cardstock
Flair Felt Tip Pens
Juice Gel Pens

I print all of my project pages on cardstock. I do this because it really helps separate the project page and the notes that are associated with each project. I also like to have something a little more sturdy for when I add a DIY folder to the back. More on that in a bit.

My only tip for the actual printing process is to make sure that you have the “actual size” option checked in the print dialogue box before printing.

After I have the page I want printed out, I fill it out. I like using the felt tip pen for project name, patterns used, size, made for, needles, gauge and yarn. Then if I have any notes I want to add to the notes section I use the gel pens. I just like to have all the important information in a bolder pen for a quick reference. Also, this is totally optional, I like to color code my pen colors with the colors of my project. I just think it looks nice.

Step two: Where to start

One of the first things I had to do was figure out what projects I was going to include in the binder. Like I mentioned a couple weeks ago, I have one mess of a binder with some relevant notes and a notebook that I use to jot things down in when I'm knitting a project. I wasn't sure if I wanted to go through that mess and reorganize or just start fresh with my current WIPs. Really, my only deciding factor was whether or not I wanted to take the time to reorganize. I decided I didn't, so I started from my current FOs.

Step three: Make folders 

Supplies:
Scrapbook paper
Glue stick

One of my major goals for my new binder was to have a place where I had my notes and my swatches in one place. More times than I’d like to admit, I make project notes on whatever fun notepad is nearby. To keep all of these in one place, I create folders for the back of each project page. This is why it’s important for me to print each project page on cardstock.
how to create a folder using craft paper
To make the folder :
  1. Fold the piece of scrapbook paper in half (hamburger style)
  2. Glue each side together (see above picture)
  3. Glue the finished folder to the back of the project page
It's a perfect place to keep my swatches, and other random notes I have floating around. I also like to keep my yarn labels in here, if I remember to keep them that is.

Another option would be to print the page out on regular paper and put it in a page protector. And put all of your notes and swatches in the back of the sheet protector.

A post shared by This Gal Knows (@thisgalknows) on Jun 1, 2017 at 11:25am PDT
Once I have my folders made, I get all my notes and patterns together, three hole punch them and put them in my binder behind my project page. See the video above for a clear demonstration. I like doing this because it gives my projects a definite starting and stopping point. With my old binder, I'd have notes and patterns all thrown in together and it'd be nearly impossible to figure out which notes went with which pattern, especially since not all my notes were associated with a printed out pattern.

Step 3: Decide how to organize projects. 

Honestly, I haven't decided on how to do this one yet. On one hand I want to organize them by project type i.e. Sweater, Socks, etc. On the other hand, I want to have them go in order chronologically. Currently, I have them in order of when I finished them Oldest to newest. It’s working for me now, but I’m not sure how it’ll work when I get more projects in there.

This method has been working out really well for me. As I get more projects in there I'm sure I'll have to revise my method. Do you guys have any thoughts on how you’ll use these in your binders? Let me know in the comments.

Over the next few weeks and months, I'm going to share more tips on how to use my knitting binder printables follow me on Tumblr, Twitter, Instagram and Pinterest to make sure you don't miss anything.
Posted by Mandi at 12:00 PM No comments:
Email ThisBlogThis!Share to XShare to FacebookShare to Pinterest
Labels: knitting

Wednesday, May 10, 2017

Free Vintage Pattern: 1940s Mommy and Me Cardigan

Free Vintage Mother and Daughter Sweater Pattern ~ This Gal Knows

Mother’s Day is right around the corner, so I thought I'd share a fun mother/daughter pattern set. The Mother's or Daughter’s Ski Jacket is as the name implies, designed to be knit for either a mother or her teenage daughter. The pattern was originally published in 1946 by Royal Society. I do wish their was a pattern for the younger girl too, but unfortunately it's only for teens and adults.

The cardigan has a simple knit and purl stitch pattern, so, if you did want to knit this in a smaller size, it would be simple enough to size down. You could either do the math yourself, I would suggest using Tasha’s How to Fit and Knit a 40s Pullover at By Gum By Golly, as a reference. Or you could use your favorite toddler or kid sweater pattern and substitute the stitch pattern.

This is a really cute cardigan with a set in sleeve and has a high round neckline. It's finished off with a single crochet chain around the front and neck band. The picture shows embroidery on the front but the only instructions in the pattern is to “embroider as desired”. Don't you just love those oh-so-specific finishing instructions?

As for most, if not all, vintage knitting patterns, this cardigan is knit flat, in pieces. I know there are a lot of people out there who hate seaming and would prefer to knit a cardigan in one piece. To do this, all you have to do is add all the cast on numbers for each piece (the two fronts and the back) together, and subtract 1 at each seam. That number is your cast on. When you cast on make sure to place markers to indicate where each piece starts and ends. That way, if there's any shaping, you know where to work it. Depending on my next vintage knit project, I might do a full tutorial. Stay tuned for that.

If you do opt to go the seamless route, you'll still need to split for the front and back to work armhole shaping, then seam the shoulders. Then you could either knit the sleeves flat and set them in, or you could follow another one of Tasha's tutorials for working set in sleeves from the top down.

The pattern calls for a discontinued yarn, I did a little bit of research and couldn't find anything on the specific yarn. But, judging by the gauge in the pattern, it’s close to an Aran weight. Given the date of this pattern, my best guess would be that it is a wool.

Although it doesn't go as small as I would have liked, it still has a pretty decent size range. It goes from a bust size of 33” to 39”. My favorite part of this entire pattern is that it has all the blocking measurements all laid out for you. When dealing with vintage patterns, it can be really hit or miss whether these details are included or not.


I've always thought these Mother/Daughter matching patterns were cute, but I don’t think I'd ever want to go around wearing the same sweater as my mom. What do you guys think, would you ever knit you and your daughter matching sweaters? Or if you're a daughter that knits, would you knit a matching sweater for you and your mom?

Over the next few months I'll be sharing more vintage patterns from my collection, follow me on Instagram and Pinterest to make sure you don't miss a pattern.

If you like this free vintage pattern, please consider buying me a coffee so I can continue to bring you guys free vintage patterns. For more information about what it means to buy me a coffee click here.

Free Vintage Knitting Pattern ~ This Gal Knows

Posted by Mandi at 12:00 PM No comments:
Email ThisBlogThis!Share to XShare to FacebookShare to Pinterest
Labels: free: vintage patterns, knitting

Wednesday, May 3, 2017

Knitting Binder Printable

This Gal Knows: Knitting Binder Printable
Since I started knitting I’ve been creating this mess of a binder I called my “project binder”. It includes mostly patterns I liked once upon a time, a few finished projects with some actual decent notes and a random folder full of hot pink filler paper. I don't know, don't ask.

I quickly realized that wasn't going to cut it. So, I for some reason thought a random notebook with all my random brainstorming ideas and pattern notes would work out. That actually does work better, especially when I'm working on a project. I'm less likely to lose my notes if they're stuck in an actual notebook. But I still liked the idea of having my printed off pattern, random notes and my swatches all in one place. And that's how my binder printouts came to be.

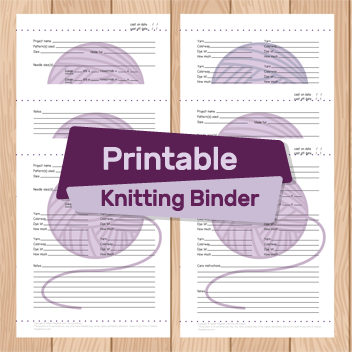
There are 4 project pages, a page for additional yarn, a page for additional notes, and a project tracker page. There's really something for every project.

Each project page has space for you to record the following:
  • Project name
  • Patterns used
  • Size
  • Who the object was made for
  • Needle sizes and gauge (both unblocked and blocked)
There's a different project page with different yarn slots that can be used to fit your needs:
  • 2 yarn slots with a large section for notes
  • 4 yarn slots with a section for notes
  • 4 yarn slots with care instruction section and notes section
  • 8 yarn slots
Additional pages include:
  • 12 additional yarn slots (if eight isn't enough)
  • Notes page
  • Project tracker - with space to record project name and both the cast on and cast off date
The binder comes in 4 color options:
  • Blue
  • Green
  • Purple
  • Pink
Printing Tips
  • For best results print on high quality
  • Make sure actual size box is checked
  • (Optional) Print borderless, if your printer allows it

These printouts have really been a lifesaver. I've been knitting a lot more sweaters recently and have knit all of my sleeves the same way. If was still “organizing” projects the way I used to, I never would remember what I’d done the time before and probably would spend a ton of time figuring it out again.

Stay tuned for more posts about how I use these sheets, follow me on Instagram to make sure you don't miss a thing.

Posted by Mandi at 12:00 PM No comments:
Email ThisBlogThis!Share to XShare to FacebookShare to Pinterest
Labels: knitting, printables

Wednesday, April 26, 2017

Fresh off the needles: It Goes Both Ways Toddler Hat

It goes both ways toddler hat
Why do kids have to grow so fast? My niece grew out of all her hats I've made her. Naturally, now that the weather is warming up, I decided I should probably get on to knitting her a new one.

The hat I knit was made from a pattern designed by CheyOnna the Yarn Mission.The Yarn Mission is a great company that I love to support as much as possible. They are dedicated to the advancement of justice and the end of an oppressive system through community engagement. For more information visit theyarnmission.com.

The Pattern

The It Goes Both Ways pattern is super clear and super adorable. I love the simple two stitch cables that create an effect that looks nothing like your traditional cable. The pattern is 100% perfect as is and I plan on knitting one for myself in the near future. But my niece got top priority, so I decided to modify it to make it fit her.

The Modifications

To start I used a sport weight yarn instead of worsted. I thought that was going to be enough of a change for me, but doing the math I realized I was going to need to do more. But still, it really wasn't that much. All I did was figure out how many stitches I needed to cast on to get the size I wanted then fudged the numbers a bit to make sure there were enough stitches to end the round with a full pattern repeat.

Having to fudge numbers did make it so that I ended up making a bigger hat than I had planned on. But when I make hats, especially when I make them for kids, I don't worry too much if it comes out a little on the big side. You know how kids are always growing like we don't want them to stay little forever. I figure, it'll fit eventually.

The only thing I wish I had taken the time to do was figure out the decreases like the original pattern. I opted to just do a stockinette section with the decreases. It really would have given the hat a more finished professional look. It does look fine, by all accounts, I just wish I would have put in a little more effort. If it really does end up bothering me a ton, I figure I can always slap a Pom-Pom on it. Pom poms fix everything.

The Yarn

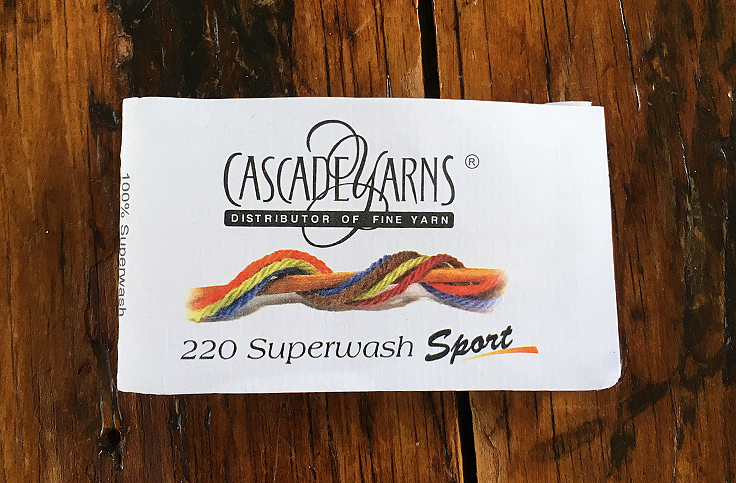
The yarn I used was Cascade 220 Superwash Sport. It is 100% superwash merino. I LOVE this yarn. I’ve always loved the color range that Cascade 220 offers, the colors are rich and vibrant and you can find just about any color you need. But the 100% wool is way too scratchy for me. Then I discovered the Superwash Merino and my life was made. It has the perfect amount of softness for me, but it's not so soft that it's slippery and hard to work with like Knit Picks Swish can be sometimes.

I for one love this hat. My niece? Not so much. Apparently she doesn't wear any thing that's not pink. She won't even try it on. I mean, I do kind of have to agree with her though. The orange I picked isn't really my favorite color either. I guess that only means I'll have to make her a pink one next.

Want to keep track of my adventures knitting for a fickle three year old? Follow me on Instagram.

Posted by Mandi at 12:00 PM No comments:
Email ThisBlogThis!Share to XShare to FacebookShare to Pinterest
Labels: finished object, knitting, this gal knits

Wednesday, April 19, 2017

This Gal Knows Book Review: The Handy Book of Sweater Patterns

This Gal Knows Book Review: The Handy Book of Sweater Patterns
Disclaimer: This post contains affiliate links, which cost you nothing, but when you buy something through these links I get a small commission. I also bought this book with my own money and was not asked to review it. All my thoughts and opinions are my own.

One of my first goals after learning to knit was to knit a sweater. I knit a few conventional sweater patterns, but it was hard for me to find patterns that came in my size. So, naturally I jumped head first into adapting the pattern all on my own. Let's just say, that little adventure may or may not have ended with me flinging notebooks around the room. Luckily, that’s when I discovered The Handy Book of Sweaters by Ann Budd.

The Handy Book of Sweater Patterns includes instructions for six different sweater constructions (Drop shoulder, Modified drop shoulder, Set-in sleeve, saddle shoulder, Raglan, and Seamless yoke). Each sweater construction is broken into two sections; kids sizes (26 in chest to 34 chest), and adult sizes (36 in chest to 54 in chest). Each size section is then broken down into five gauges. All you have to do is swatch your yarn, pick the size you want to knit and you have a basic sweater pattern that you can customize as you see fit. With this ginormous range of sizes, it’s been perfect for when I’m trying to resize certain patterns.

It by no means is a fully comprehensive design book, you will still need to know basics about what roles certain yarns and stitch patterns play in your finished sweater. But there are piles upon piles of books out there with that type of information. As well as some great online resources.

I will say, that while I think it’s great for beginner sweater knitters, I suggest you try out a conventional sweater pattern first, especially one geared towards first time sweater knitters. Or at the very least watch a few video tutorials to fully understand sweater construction. There are a few things that I can see becoming confusing for someone who hasn’t knit a sweater before. Here's a Ravelry bundle I'm working on filled with good beginner sweater patterns.

My absolute favorite thing about the book is the wide variety of pattern options. You could literally knit something for the entire family from this book. The sizes may not go down to infant sizes, but with the measurements of your desired finished object, your gauge and a little bit of math, you could easily use the numbers for a different gauge and size and make it work for your baby.

The one thing I really don’t care for is that there’s no bottom up instructions for raglan sleeves. In the book it gives instructions for top down raglan sweaters. I know it’s more common to knit a raglan sweater top down, but I’ve come to realize I don’t really care for the line of increases down the sleeve and I would have really like to have bottom up instructions. It’s especially frustrating since there was eventually an entire book dedicated to top down sweater construction.

I really love the flexibility of this book and I would really recommend this book to any knitter who likes to knit sweaters and wants to bring their sweaters to the next level. It's especially handy for folks who knit several different sweater sizes. Or those of you who are like me, and need a little help modifying an existing pattern to work for you.

Have you used this book in the past? I'd love to hear your experiences in the comment section.

As always to see my sweater process, follow me on Tumblr, Twitter, Instagram and Pinterest.

This Gal Knows Book Review The Handy Book of Sweater Patterns
Posted by Mandi at 12:00 PM No comments:
Email ThisBlogThis!Share to XShare to FacebookShare to Pinterest
Labels: book review
Newer Posts Older Posts Home
Subscribe to: Posts (Atom)

Hi! I'm Mandi. Here you’ll get to see all my current knitting, sewing and craft projects. As well as links to all the resources I've found useful throughout my crafting life.

Printables

Printables

Popular Posts

  • Freebie: Printable Hang Tags for Gifts
    Up your handmade gifts with these free printable hang tags. These are perfect for anyone who gives a lot of hand knit or crocheted gif...
  • This Gal's Gift Ideas for the Knitters in Your Life
    Tell me if this sounds familiar. The holidays come along and you're making gift list ideas for all the people in your life. It's ...
  • This Gal Learns to Play Guitar: Day One
    It might be a bit premature to be writing about this since it was just yesterday that I started. But I don't really care. I've b...

This Gal's Favorite Blogs

An Awesome View of Life
By Gum By Golly
Lladybird
Tilly and the Buttons
The Sunny Stitcher

Pages

  • Home
  • About Me
  • Knitting Resource Masterlist

Blog Archive

  • ▼  2020 (1)
    • ▼  December (1)
      • Maker Goals 2021
  • ►  2019 (2)
    • ►  May (2)
  • ►  2018 (9)
    • ►  December (3)
    • ►  November (3)
    • ►  October (1)
    • ►  February (2)
  • ►  2017 (19)
    • ►  November (1)
    • ►  October (2)
    • ►  September (1)
    • ►  August (1)
    • ►  July (1)
    • ►  June (3)
    • ►  May (5)
    • ►  April (4)
    • ►  March (1)
  • ►  2016 (8)
    • ►  September (2)
    • ►  August (3)
    • ►  June (1)
    • ►  April (1)
    • ►  March (1)
  • ►  2015 (14)
    • ►  November (1)
    • ►  October (1)
    • ►  September (1)
    • ►  August (1)
    • ►  May (1)
    • ►  April (3)
    • ►  March (1)
    • ►  February (1)
    • ►  January (4)
  • ►  2014 (10)
    • ►  November (2)
    • ►  September (4)
    • ►  February (1)
    • ►  January (3)
  • ►  2013 (50)
    • ►  December (2)
    • ►  October (3)
    • ►  September (1)
    • ►  July (2)
    • ►  June (4)
    • ►  May (1)
    • ►  March (4)
    • ►  February (32)
    • ►  January (1)

Copyright © This Gal Knows | Powered by Blogger
Design by Hardeep Asrani | Blogger Theme by NewBloggerThemes.com